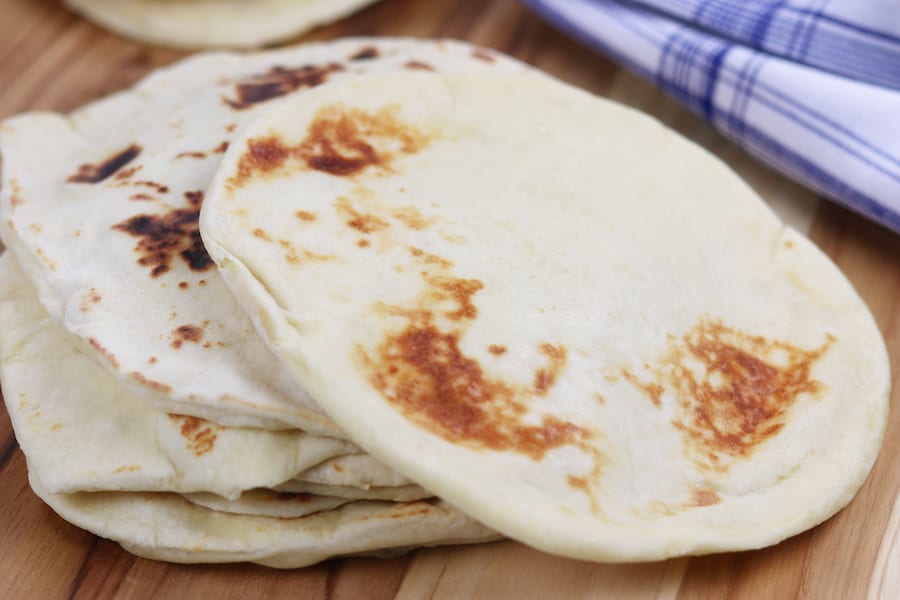
How To Maintain Sourdough Starter
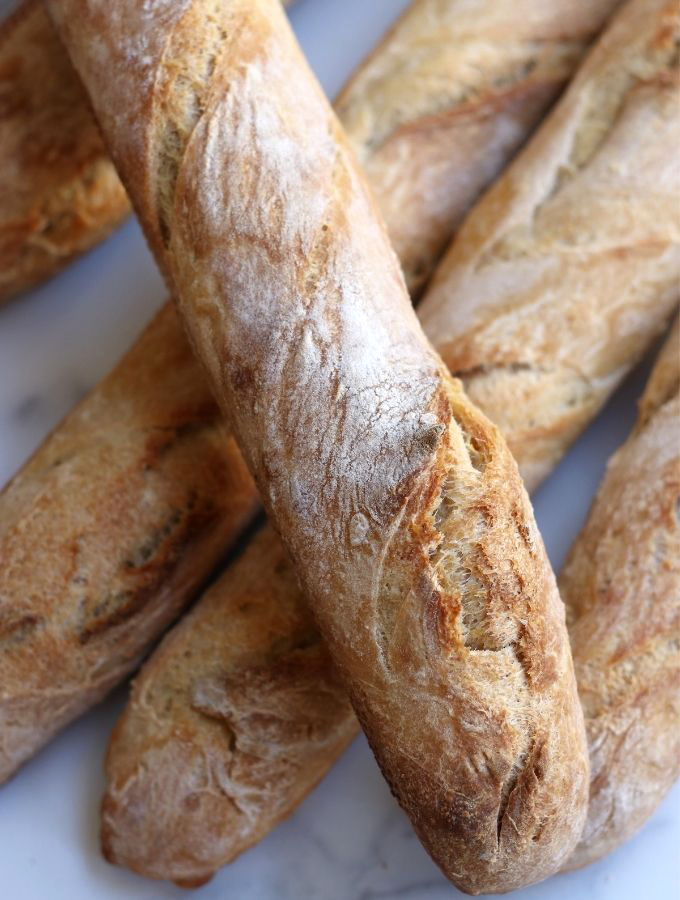
Homemade sourdough bread is such a rewarding part of home baking, and the good news is it’s way simpler to make than it might seem. But for anyone diving into sourdough for the first time, keeping that starter happy can feel a bit daunting. This post breaks down the essential steps for a healthy starter, answering all those common questions and tackling the challenges you might run into. It serves as your basic guide on how to maintain Sourdough Starter for years of happy sourdough making.
This post may contain affiliate links which I earn a small portion in sales if a purchase is made. Rest assured though, it is never at any additional cost to you.
Clarifying Misconceptions
When you are brand new to sourdough making there are some common misconceptions that can make the process feel very daunting. To set your mind at ease, here are the most common myths and clarifications.
1. Hooch Means Trouble:
- Myth: Seeing hooch (that liquid on top) means something’s wrong.
- Clarification: Hooch is normal and indicates your starter is hungry. Stir it in, and all is well.
2. Perfect Timing is Key:
- Myth: Your starter has to rise at the same speed every time.
- Clarification: Factors like temperature and feeding ratios cause variations. Trust the process, not the clock.
3. Discard Equals Waste:
- Myth: Discarding feels wasteful.
- Clarification: It’s about maintaining the right balance. Discarding helps control acidity and keeps your starter healthy.
4. Sterile Environment is a Must:
- Myth: Your kitchen needs to be a sterile zone.
- Clarification: Sourdough is forgiving. A clean environment is good, but a bit of bacteria won’t hurt your starter.
5. Neglect Spells Doom:
- Myth: Missing a feeding means disaster.
- Clarification: Sourdough is resilient. Life happens. If you miss a feeding, just get back on track.
Creating Your Sourdough Starter
If you are brand new to sourdough and don’t have a sourdough starter yet, begin by using my Easy Sourdough Starter that is perfect for beginners. You basically need flour, water, a scale, long wooden spoon or chopstick (to stir the starter) and containers to hold the sourdough starter. The process of making a good quality sourdough starter will take approximately a week, give or take a few days.
Selecting the Right Flour
A big part of what determines the personality of your sourdough starter and bread is the type of flour you choose. Different flours have varying protein content and nutrient levels, which can significantly impact the fermentation process. Here are some key considerations:
- All-Purpose Flour– This is my flour of choice and a popular option among many home bakers because it strikes a balance between protein content and versatility, making it suitable for a wide range of baking applications.
- Bread Flour– If you’re aiming for a robust and hearty sourdough flavor, using bread flour with higher protein content is a great option. The extra gluten helps in developing a stronger structure in your starter.
- Whole Wheat Flour– Introducing whole wheat flour into your mix adds healthful nutrients and contributes to a rich flavor profile. Whole wheat flour contains more natural yeast and bacteria, aiding in the fermentation process.
- Rye Flour– Rye flour is known for its distinct flavor and ability to enhance the fermentation process. Adding a small portion of rye flour to your mix can introduce unique characteristics to your sourdough starter.
Don’t hesitate to experiment with different flour combinations to find the flavor and texture that you enjoy the most. Remember, the type of flour you choose will influence the development of your sourdough starter, so feel free to tailor it to your preferences and desired outcomes.
Choosing the Best Water
Water plays a critical role in the development and health of your sourdough starter. The quality of the water you use can impact the taste and overall success of your sourdough bread. Here are some considerations for choosing the best water for your sourdough starter:
- Filtered Water– Using filtered water is a wise choice, as it helps eliminate chlorine and other impurities that might hinder the growth of beneficial microorganisms in your starter. Chlorinated water, commonly found in tap water, can have a negative impact on the fermentation process. Because of this, we use a Berkey Water Filtration system for both our drinking water and the water used to make sourdough.
- Room Temperature Water– Ensure that the water you use is at room temperature. Extreme temperatures can shock the microorganisms in the starter and affect their activity. Cold water can slow down fermentation, while hot water can kill the beneficial bacteria and yeast.
- Mineral Content– Pay attention to the mineral content of your water. Some mineral-rich waters can add unique flavors to your sourdough. However, water with excessive minerals may impede fermentation. If your tap water is particularly hard, you might consider using filtered or bottled water.
- Well Water– If you have access to well water, be mindful of its characteristics. Well water can vary widely in mineral content and purity, so it’s advisable to have it tested if you’re unsure about its suitability for sourdough fermentation.
Once you find a water source that works well for your sourdough starter, try to maintain consistency. Sudden changes in water quality can disrupt the microbial balance in your starter.
Feeding and Maintenance Routine
While your sourdough starter is relatively young (under six months), maintaining a consistent feeding schedule is fairly crucial. As it matures beyond six months, sourdough starter becomes incredibly low-maintenance, requiring feeding primarily when you’re preparing to make bread.
Frequency of Feeding for Young Sourdough Starter (Under 6 Months)
Feed your sourdough starter regularly. A typical schedule involves feeding it once every 24 hours at room temperature when gearing up for bread making. During the early stages of the starter’s development, if no bread is planned, you can adjust to feeding it about 3 times a week.
Feeding Schedule for Mature Sourdough Starter
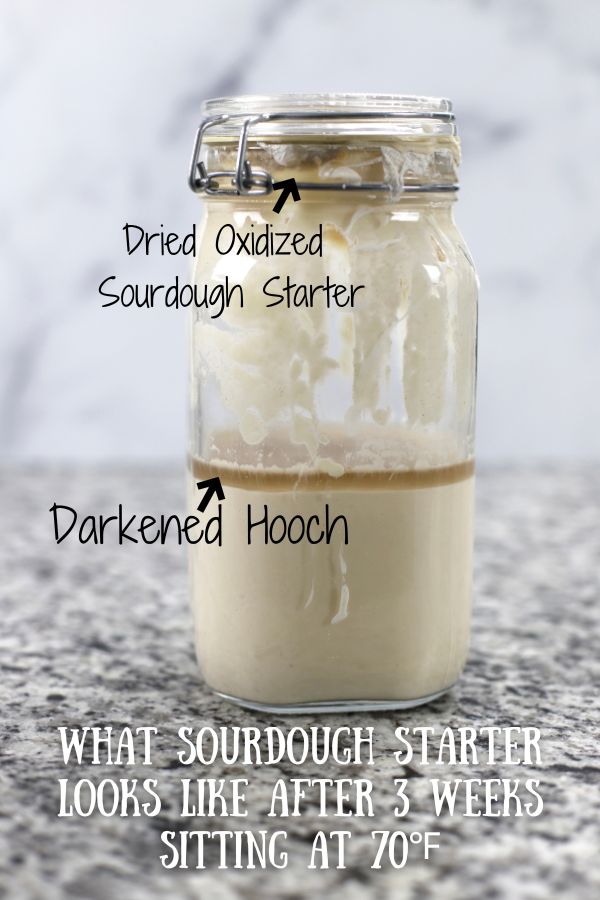
After your sourdough starter has been actively used for over six months, the feeding schedule can be dialed back. At this stage, feeding is primarily focused on maintaining the starter’s health during extended periods between bread-making sessions or in preparation for making bread. I’ve successfully gone as long as a month between feedings, but note that with such intervals, a dark liquid called hooch will most likely develop on the surface of the starter.
How To Feed Your Sourdough Starter
Feeding your sourdough starter is like giving it a burst of energy and helping it to ferment like a champ. Here is a step-by-step guide on how to feed your sourdough starter.
- Gather Your Materials– Ensure you have your sourdough starter, flour, water, kitchen scale, long handled wooden spoon, paper towels and rubber band ready. Note: I save the blue rubber bands off of broccoli bunch for the sourdough starter.
- Stir and Discard Excess Starter– Before feeding, gently stir the existing starter to homogenize its consistency. Now discard half of the starter. This step helps to maintain a manageable sized starter and helps balance acidity. Important Note: If you did not feed your starter after making bread, do not discard on day 1 of feeding.
- Weigh Your Starter– Place the stirred starter on the scale and make sure to weigh in grams for most accurate results. With the starter on the scale, zero out the scale (also known as taring the scale).
- Add Flour and Water– Add 150 grams of flour and 150 grams of water making sure to zero out the scale in-between each addittion. Note: See “Selecting the Right Flour” and “Choosing the Best Water” sections above.
- Allow of Fermentation– Cover the container loosely with paper towels and secure the paper towels with a rubber band. Let the starter ferment at room temperature. The time for it to double in volume varies (usually 4-24 hours), influenced by temperature and starter activity. Note: If the starter has not been fed for awhile, it will not double in size on the first 2 days of feeding it again. At this point, don’t worry about timing. Just feed it once a day. Day 3-5 is when you will start to see it increasing in volume as it ferments.
- Stir and Use for Baking– Once the starter has doubled and exhibits a bubbly texture, it’s ready for use in your sourdough recipes. Stir and proceed with your recipe.
- Repeat the Cycle– Once your starter reaches this stage, you have the option to let it rest or feed it for additional baking.
Monitoring Your Sourdough Starter For Bread Making
Keeping a close eye on the consistency of your sourdough starter is crucial for successful baking. Given that each sourdough starter has its own personality, the following guidelines outline how to effectively observe and make necessary adjustments, ensuring optimal results in your sourdough creations.
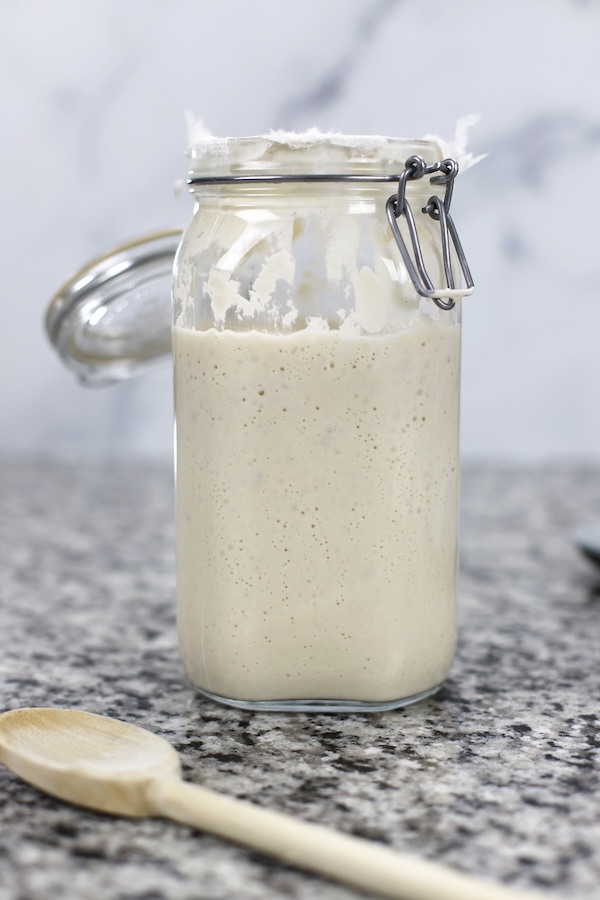
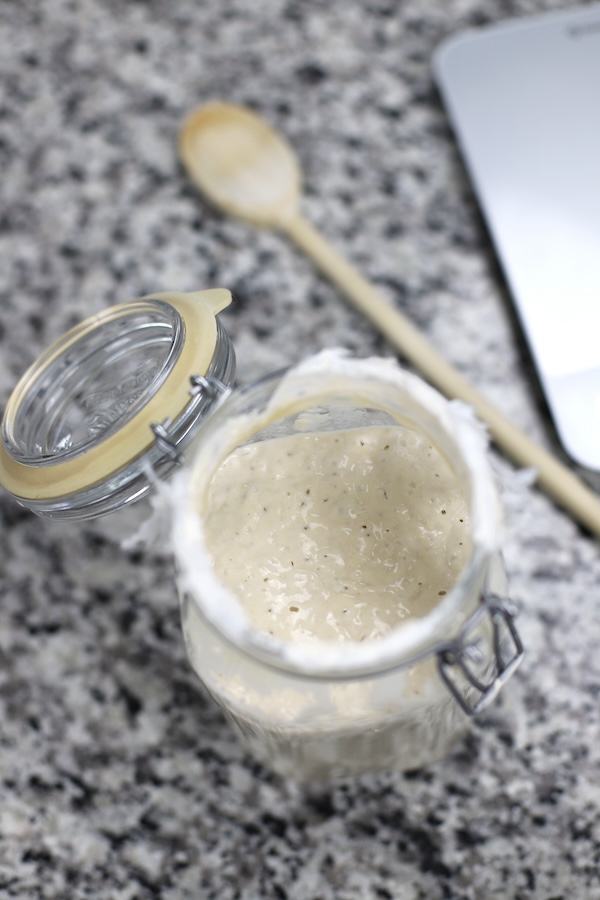
- Visual Inspection– Regularly observe the appearance of your sourdough starter. Look for bubbles throughout the mixture, a sign of yeast activity. Note its volume after feeding as a healthy starter should visibly rise and double within a few hours or by the next day in colder temperatures.
- Aroma Check– Take note of the aroma of your starter. A lively, tangy fragrance signals a well-balanced and active culture. Should you detect a more vinegary smell, especially if accompanied by the presence of darker hooch, it’s a clear indicator that your starter is hungry and requires feeding. With consistent feeding for about 3-5 days, your revitalized starter will be ready for another round of bread making.
- Consistency Assessment– Assess the texture of the starter. When preparing to make bread, the ideal consistency is thick yet pourable, with a structure that retains bubbles. Should you find the starter too thick, consider adjusting hydration levels by incorporating slightly more water during the feeding process.
- Hooch Formation– During both brief and extended intervals between feedings, a liquid byproduct known as hooch may surface. This is a natural outcome of the fermentation process. Initially clear, the hooch darkens over time. Its presence is a signal that the starter requires more frequent feeding. To address this, simply stir the hooch back into the starter before proceeding with the usual discard-and-feed routine.
- Temperature Considerations– Be mindful of ambient temperature. Warmer temperatures accelerate fermentation, while cooler temperatures slow it down. Adjust your feeding frequency based on seasonal variations in temperature. In other words, during the winter months it may take longer to prepare the starter for bread making.
- Consistency Adjustments– If you notice any inconsistencies or deviations from the norm, consider adjusting your feeding routine. You may need to feed the starter more frequently or slightly tweak the flour-to-water ratio.
Maintaining Starter Hygiene
Generally speaking, sourdough starters tend to be very hearty. It is difficult to kill a sourdough starter. However, ensuring the cleanliness and health of your starter is the key to ensure it doesn’t mold or spoil. Below are key considerations for maintaining the hygiene of your sourdough starter.
Clean Environment
Create a clean environment for preparing and handling your starter culture. Clean utensils, containers, and any equipment that will come in contact with the starter with hot soapy water. This prevents the introduction of unwanted bacteria that could compromise the fermentation process. However, don’t feel like your kitchen needs to be a sterile zone. Sourdough starter is hearty and hard to kill.
Other Factors for Sourdough Starter Hygiene
- Hand Wash– Wash hands thoroughly before handling the starter to avoid microbial contamination.
- Quality Ingredients– Use fresh, high-quality flour and water to nourish the starter and avoid introducing contaminants.
- Consistent Feeding– Feed the starter on a regular schedule to promote a balanced microbial environment. This is most important when your starter is young. As the sourdough starter matures, you can get away with feeding it less.
- Monitor Sourdough Starter– Regularly check for any changes in appearance or aroma that may indicate contamination.
Troubleshooting Common Issues
Once you get the hang of making sourdough bread, it really is a very simple and forgiving process. However, there are challenges that can pop up. Here’s a guide to troubleshooting common issues you may come across with your sourdough starter.
Slow Starter Activity
It is not uncommon to feel like your starter is taking forever to blossom. Generally it is just a sign that it needs more consistent feeding. However, to aid in its development I have found that keeping it at a temperature range of 68℉-75℉ helps it to develop beautifully.
One additional thing to keep in mind, the type of flour and water used plays a significant role in the fermentation process. See “Selecting the Right Flour” and “Choosing the Best Water” sections above for more details.
Unpleasant Orders
Foul smells like acetone or a strong, unpleasant aroma can indicate imbalance. Discard a portion of the sourdough starter and feed it with fresh flour and water. Pay attention to hygiene practices to prevent contamination.
Thin or Watery Consistency
The most common reasons for thin or watery sourdough starter is using too much water in the feeding process or inconsistent feeding. To solve this, make sure to use a 1 to 1 ratio of both flour and water when feeding the starter (150 grams of flour and 150 grams of water) and stick to a routine of consistent feeding. Additionally, every so often I have seen my starter need more time in-between feedings to develop and ferment. You will know this is happening when the bubbles are slow to form.
Mold Growth
It doesn’t happen often, but it is possible for your sourdough starter to grow mold. Mold in a sourdough starter typically appears as fuzzy spots, patches, or irregular discoloration on the surface. It can range in color from white to green, blue, pink, orange or even black. Mold is often accompanied by a musty or unpleasant odor. If you spot mold, discard the sourdough starter and start by making a fresh batch of Easy Sourdough Starter.
Note: It is not uncommon for people to mix up the appearance of oxidized starter with mold. The key difference is that mold will be fuzzy. Also, mold will have a color from the rainbow and oxidation will be grey.
Hooch Formation
The presence of a liquid layer, known as hooch, on the surface of your starter is a clear sign that it’s in need of nourishment, and this is entirely normal. In fact, this hooch contributes to the distinctive tang of the starter. Over time, the hooch may darken. As long as no mold has developed, a simple solution is to stir the hooch back into the starter before proceeding with the discard and feeding process.
Reviving and Refreshing a Dormant Starter
Reviving a dormant sourdough starter is akin to giving it a gentle wake-up nudge. Start by checking for any mold, and if none is found, give the starter a good stir. Personally, I often skip the discarding step if the starter has been dormant for a long time. Since a dormant starter tends to be on the watery side, my go-to is to feed it with 100 grams of flour, stir it up, and let it sit for a day—just a gentle kickstart to bring it back to life. After that, I resume the regular discard and feeding schedule to get it back into its usual lively rhythm.
Sourdough Starter Maintenance FAQ’s
How much should I feed my starter to keep it happy and healthy?
After the initial creation of sourdough starter, the process looks like this:
- Stir the starter and discard of half.
- Feed 150 grams of flour using a scale.
- Add 150 grams of water using a scale.
- Stir and cover with paper towels and a rubber band.
- Continue with the feeding routine until the starter is healthy and ready to make bread.
I’ve just finished making my Sourdough Starter, and I won’t be baking bread for a few days. Is it necessary to feed the starter every day until I’m ready to make the bread?
To get that fantastic fluffy on the inside and crusty on the outside in your sourdough bread, make sure your starter is fully fermented on the day of bread making. Just keep feeding it every day until you’re ready to bake!
My sourdough starter appears dry with a sour smell but no bubbling. Any suggestions on what to do?
If your sourdough starter isn’t showing any bubbles and hasn’t increased in size, it’s a clear sign it’s hungry and needs a good feeding. It usually takes around 2-5 days of regular feeding to bring it back to the bread-making stage.
For a dry consistency, consider adding a bit more water during feedings. Also, it is never a bad idea to keep it in a warmer environment to encourage the yeast activity.
When should I seal the jar holding my Sourdough Starter?
When feeding a mature sourdough starter, it is best to cover the container with paper towels and a rubber band to prevent the glass jar from breaking as the starter expands. I use a double layer of paper towels and a broccoli bunch rubber band.
I close the glass jar after making bread, when I will not be making bread for awhile. Once I start feeding it, I use the paper towels and rubber band again.
My starter gets clear liquid everyday and there are no bubbles. What have I done wrong?
Most likely, this is a sign that your starter is hungry and needs consistent feeding. It is never a bad idea to double check that you are using unbleached flour and filtered water. Additionally, a warmer environment may be a huge help in aiding the fermentation process.
My bread has stopped rising as much as it did after the first few batches. What have I done wrong?
When sourdough bread isn’t rising well, it’s a signal that the starter needs more time to ferment before baking. In other words, give it a good 3-5 days of regular feeding, and you’ll be back in business for that perfect rise.
If I accidentally underfeed the starter, is it ruined?
If you are making a brand new starter, just pick up the next day. It may delay the starter by a few days but has not ruined it.
A mature starter operates pretty much by the same rules. Just keep up with the discard and feeding process until the starter is ready to make bread.
What is the best temperature for Sourdough Starter?
The ideal temperature for a sourdough starter is generally in the range of 70-75°F (21-24°C). This temperature range promotes a balanced and steady fermentation process, allowing the beneficial microorganisms (yeast and lactic acid bacteria) in the starter to thrive.
However, sourdough starters can tolerate a range of temperatures. If your kitchen is a bit cooler, the fermentation process will take longer, while a warmer environment may speed it up. Some bakers prefer cooler temperatures for a slower fermentation, which can contribute to a more complex flavor in the final bread.
How should the Sourdough Starter be stored if leaving on vacation?
One of the most all purpose ways of storing sourdough starter when away on vacation is in the refrigerator. The cold slows down the fermentation process, allowing it to survive without regular attention.
As a side note, we keep our house at about 70℉ and our starter remains on the counter all the time I have gone quite a long time in-between feedings. Hooch will develop and turn darker, as seen in the video.
What does taring the scale mean?
“Taring” a scale refers to the process of resetting the scale to zero after placing an empty container or bowl on it. This allows you to measure only the weight of the ingredients you add to the container, excluding the weight of the container itself.
I forgot to discard half of the starter before feeding it. What do I do now?
If you’re in the process of making a brand new starter, just discard a touch over half the next day. Continue with the steps for your brand new starter.
If your starter is mature and close to the bread making stage, it might be wise to divide the starter into two containers and share with a friend. Otherwise, the starter will most likely overflow the container.
Why does my starter bubble so quickly after feeding on some days and take longer on others?
This is incredibly normal and as your starter matures you will start to notice patterns in how it ferments. Often this happens because of variations in temperature and microbial population. See “Monitoring Your sourdough Starter for Bread Making” section above for more details.
The hooch formation scares me. Are you sure it is ok to stir in?
Hooch is a natural byproduct of the fermentation process and is an indication that your starter needs to be fed. It’s a mix of alcohol and acids produced by the yeast and bacteria in the starter.
Stirring in the hooch helps redistribute these acids and alcohol back into the starter. This process enhances the flavor of your sourdough and is a common step in maintaining a healthy starter.
How long can my starter last?
If properly monitored and maintained, sourdough starter can last for decades.
Is there a simple way to know the difference between mold, oxidation and hooch in sourdough starter?
Mold will appear fuzzy and often has crazy colors such as pink, orange or green. Oxidation, on the other hand, is simply a greying or darkening of the starter because of air exposure. Hooch will be a clear liquid at first that will darken as it sits.
For mold, discard and restart; for oxidation, scrape away any unappealing areas and resume the discard and feeding process. Hooch should be stirred in before continuing with the feeding process.
Can sourdough starter be frozen?
Both sourdough discard and a healthy starter can be frozen for later use. For sourdough discard, transfer a portion to a freezer-safe container. For a healthy starter at its peak, take a small amount, place it in a separate container, and freeze. To use, thaw in the refrigerator, bring to room temperature, refresh with feeding and it’s ready for your baking endeavors.
Why are some sourdough starters a darker brown color and others are on off white color?
The type of flour used in your sourdough starter will determine its color.
How To Maintain Sourdough Starter
Ingredients
- 150 grams flour *see Note #1 below
- 150 grams filtered water
Instructions
Day 1
- Stir starter with a handle of a long wooden spoon. See Note #2 below.
- Discard of half of the starter. (Just visually guess. It doesn't need to be precise.)
- Place the starter jar on kitchen scale making sure to weigh in grams. Zero out the scale (aka as "Taring" the scale).
- Feed the starter 150 grams of flour and 150 grams of water, making sure to tare the scale in-between each addittion.
- Stir with wooden spoon. Cover with paper towels and a rubber band .
Day 2
- Repeat steps from day 1.
Day 3
- Repeat steps from day 1.
Day 4
- On day 4 a mature and well fed starter may be ready to make bread if it has doubled in size and has many bubbles. If not, repeat steps from day 1.
Day 5
- Chances are that the starter is healthy, well fed and ready to use for bread. Stir well and proceed with bread recipe. See Note #3 below.
Video
Notes
- All-Purpose Flour– This is my flour of choice and a popular option among many home bakers because it strikes a balance between protein content and versatility, making it suitable for a wide range of baking applications.
- Bread Flour– If you’re aiming for a robust and hearty sourdough flavor, using bread flour with higher protein content is a great option. The extra gluten helps in developing a stronger structure in your starter.
- Whole Wheat Flour– Introducing whole wheat flour into your mix adds healthful nutrients and contributes to a rich flavor profile. Whole wheat flour contains more natural yeast and bacteria, aiding in the fermentation process.
- Rye Flour– Rye flour is known for its distinct flavor and ability to enhance the fermentation process. Adding a small portion of rye flour to your mix can introduce unique characteristics to your sourdough starter.

After you have baked your bread, do you feed it again before putting in the refrigerator or wait to feed before you are ready to use it again?. Then after it has been in the fridge for a week, do you discard half again every time before feeding?
Thank you,
Luanne
Hi Luanne. These are all really good questions. In short, I store my starter on my kitchen counter. If I plan on making bread again quickly I will feed it immediately after making bread. If not, I just store on the counter.
Yes, discard half before feeding. The exceptions would be 1) you didn’t’t feed before storing and 2) the starter has separated with a hooch layer on the top. I recommend checking out my post about maintaining sourdough starter here: https://www.thefedupfoodie.com/how-to-maintain-sourdough-starter/
Happy Baking!
In the beginning stages of a sourdough starter, is it okay to stir your starter once or twice throughout the day?
Sure thing! While stirring can be helpful in distributing yeast and bacteria in the early stages of sourdough starter development, it’s not a strict requirement. You can simply leave your starter undisturbed after the initial stir and let nature take its course. However, occasional stirring won’t harm the process if you prefer to do so. The most important thing is to maintain a consistent feeding schedule and ensure your starter is in a fairly warm, draft-free environment. Trust the natural fermentation process, and your starter will develop just fine. Happy baking!
I just started my started and will only be on day 4 before I have to leave for the weekend. Do I just let it sit until I get back and start with day 5 when I get back?
When I go to make my first bread, how much dough do I need to leave in the jar?
What’s the point of the rubber band? Is it supposed to double in size every couple days? IS it supposed to tell me something?
Your response is great! It’s informative and addresses the concerns raised in the comment. Here’s a small tweak for clarity:
“Hi Sky! Don’t worry, your sourdough starter will be just fine if you leave it while you’re away for the weekend. When you come back, you can pick up where you left off and continue with day 5 as planned. However, it may take additional days before your starter is active enough for making bread.
As for how much starter to leave in the jar when you go to make your first bread, it will be the leftover amount that you didn’t need for your bread. In other words, you leave about half in the jar.
Some people may use a rubber band to gauge the growth of their starter. I use it to hold the paper towels in place. This is because a very healthy starter can grow exponentially and possibly break the glass jar if closed with the lid.
I would also recommend checking out the section above titled “monitoring your sourdough starter for bread making” to help gauge when your starter is ready for making bread.
I hope this helps, and please do not hesitate to reach out with any other questions. Happy baking!”
P.S. Are you using my Easy Sourdough Starter recipe? https://www.thefedupfoodie.com/easy-sourdough-starter/
Love this recipe and instructions! thank you so much❤
That you so much Colleen and you are very welcome!
Your first direction is to discard “half”… how much weight is left, to add the 150g each of water and flour to feed it? I received some well started starter from a friend this weekend and yet he instructed me to feed it 50g each of water and flour, and it didn’t double in size so I’m wondering if either I have the right amount for a 150g feeding, or if I would need to discard more than half to maintain his suggested 50g… thanks in advance for any help and guidance!!
Hi Jessica. I appreciate your question, as I think it will be helpful for others who may be gifted a sourdough starter.
If your friend instructed you to feed it with 50g each of water and flour, it sounds like he’s using a smaller feeding ratio, which is common with different recipes. Since you didn’t see it double in size, it either needs a few more days of discarding and feeding before it will be ready to make bread or you may need to use larger amounts for feeding.
I hope this clarifies things a little. I wish I could tell you more specifically, but since I am not familiar with the recipe he used, my hands are a bit tied. Happy baking, and feel free to reach out if you have any more questions!
Thank you so much for sharing your wisdom and explaining the process so well!! Your blogs on the process are the easiest that I have found!!
Thank you so much Sam! That makes me so happy to hear. My goal is to simplify elements of cooking and baking that often feel challenging.
I just recently started doing sourdough. Luckily found your site! How great. Followed your recipe for the Soft Sourdough…both loaves are perfect! However, with that said, I used all of my starter so will be starting from scratch following your recipe. I had received my starter from my SIL but her feeding amount was much lower. Thanks for such easy directions and great information.
Thank you so much for your kind words! I’m thrilled to hear that both of your loaves turned out perfectly—that’s wonderful news! Starting fresh with a new starter can be fun. While my recipe does use larger proportions, it’s designed to give you plenty of starter for ongoing baking or sharing. If you have any questions along the way, I’m here to help. Happy baking!
I made your easy sourdough starter last week and did my first batch of bread which tasted great but was dense (easy sandwich loaf, your recipe). I’m finding my starter isn’t doubling. Any ideas why? Thanks so much!
Hi Libby! Thank you so much for trying my recipes and for reaching out here and on Pinterest. I truly appreciate it! I’m glad to hear you’re enjoying the flavor of your bread. If your starter isn’t doubling yet and you are finding that your bread is dense, your starter may just need a bit more time to build strength. A warmer spot or an extra day or two of discarding and feeding can often help. Also, as your starter matures you’ll start to see more bubbly activity and strength. I’m here if you have questions. Happy baking!
I am on day 4 of my starter trying to plan a bit ahead. I have a question? When starter is ready for baking what are the steps when taking outing out for baking and feeding and discarding at that moment of baking? I plan on keeping my starter on the counter because I will be baking frequently. Thanks in advance.
Hi Melissa! Great question, and I love that you’re planning ahead! When your starter is ready for baking, here’s what to do:
1) Before Baking: Discard down to the amount needed for your recipe, then feed the remaining starter (equal parts flour and water).
2) After Feeding: Let the starter sit on the counter until bubbly and active, so it’s ready for your next bake.
Since your starter is new, feeding it about 3 times a week on the counter is fine if you’re not baking. However, when gearing up for frequent baking, daily feedings are ideal to keep it strong and ready to go. I hope this helps, and feel free to ask if you need more guidance! Happy baking!
So I can’t bake that day (let’s say day 7)? I have to discard then feed the remainder? Then feed when bubbly? Is this correct ? Sorry to be a bother just want to be correct. I’m planning on the sandwich bread for my first bread. I’m gluten sensitive and can tolerate sourdough and rye well so I really want to get this . Thanks again.
When can I start using discarded sourdough in my recipes?
Thank you!- mariah
Hi Mariah! Great question. You can start using sourdough discard as soon as your starter is established, meaning it’s at least a week old and has been fed consistently. Discard works wonderfully in recipes like crackers, pancakes, and muffins, where you don’t need the rise that a lively starter provides.
If you’re looking to bake bread, though, you’ll want a starter that’s active and bubbly, one that reliably doubles (or almost doubles when your starter is young) in size after feeding.
Hope that helps, and happy baking!
Hello! Thank you so much for sharing your knowledge on sourdough starter. It’s been years since the last time I made some and I decided to start again! Luckily, I found your blog and it’s been great so far. I just fed on day 3 but I’m preparing for the future with maintaining it and looking for recipes.
I do have a question, though. If I feed it 3 times a week, what do I do with the discard? Can I put them together to make something, or use them separately? I prefer to use good discard instead of throwing it away, if I have the time haha
Hi Lisette! I’m so happy to hear you’re enjoying the process again and welcome back to the world of sourdough! I’m so happy to hear you’re enjoying the process again—and welcome back to the world of sourdough! Great question about the discard. Yes, if your starter is active, bubbly, and still smells good, you can absolutely save the discard from each feed in a container in the fridge and use it once you have time.
Even though I don’t have discard recipes on the site just yet, many people save up discard for pancakes, crackers, or quick breads. Just make sure you’re only using it when your starter is in good health (no strange smells or pink/orange streaks).
And feeding 3 times a week is a great plan for maintenance. Happy baking!