Easy Sourdough Starter
This Easy Sourdough Starter recipe creates gorgeously fluffy homemade products such as Sourdough Baguettes. Included are simple step by step instructions on how to start, feed and Maintain Sourdough Starter that is perfect for beginners.
This post may contain affiliate links which I earn a small portion in sales if a purchase is made. Rest assured though, it is never at any additional cost to you.
What is Sourdough Starter
Very simply, sourdough starter is a fermented mixture of two ingredients, water and flour. Wild yeast found in flour flourishes when added to water and is allowed to rest in between feedings. This approach is the old fashioned way of making bread that has been done for centuries. It does require more time than active-dry or instant yeast but produces exceptional taste and textured baked goods.
Tools Needed
In addittion to the flour and water a few tools are needed to make your own from scratch Sourdough Starter.
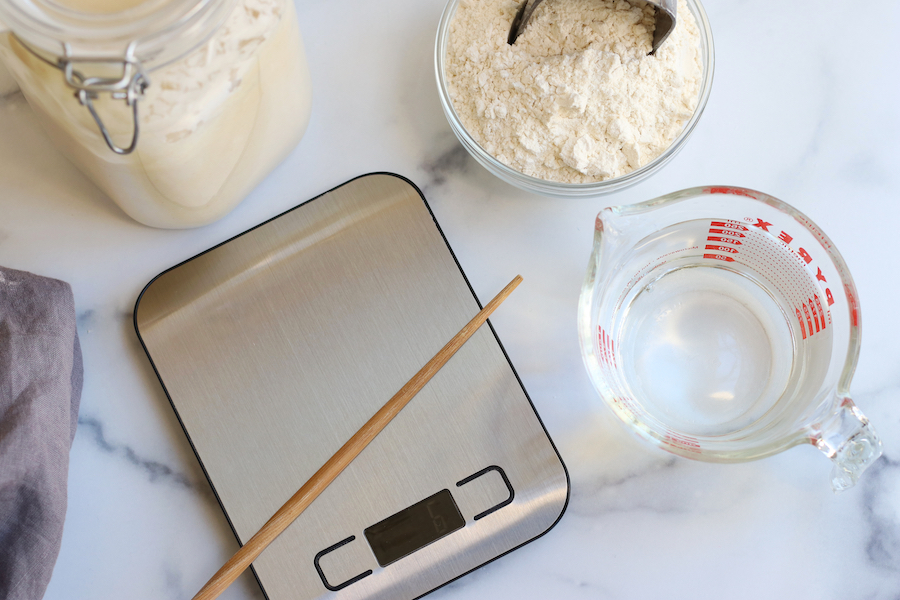
- Kitchen Scale- It is highly encouraged to use a kitchen scale to weigh the flour and water in equals parts to achieve the best results. This is the scale shown in the picture above. However, my next kitchen scale will be a little larger to accommodate the large bowl needed to make sourdough bread.
- Chopsticks– This makes stirring the starter in a glass jar much easier.
- Glass Measuring Cup– Makes for easy pouring of water.
- Scoop or Spoon– Helps with the addittion of flour.
- Medium Sized Glass Bowl– The first few days of a starters life is easier done in a medium size glass bowl.
- Plastic Wrap or Reusable Food Wraps– For the first few days of the starters life.
- Glass Jar (see below)
Sourdough Starter Container
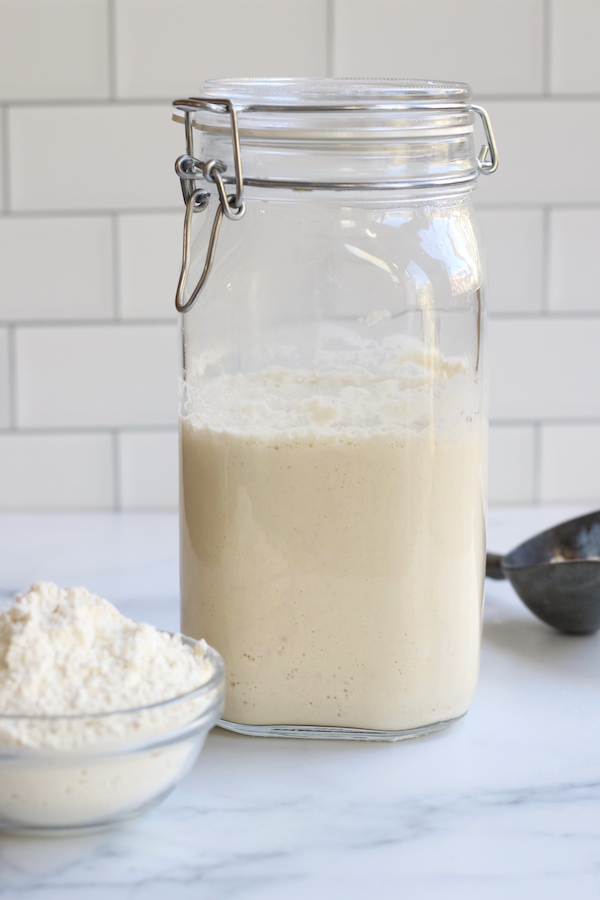
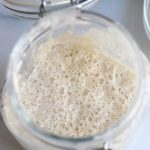
The type of glass jar needed will depend on which type of flour you use to make your starter and how rapidly your starter ferments. This is the jar seen in the photo below and it works beautifully when using white all-purpose flour. Please see section directly below (White Flour vs Wheat Flour) for more explanation.
White Flour vs Wheat Flour
The type of flour used will have a great influence on how your Stater ferments and the final product that you make with it. However, it is most important to not choose bleached flour as this will impede the fermentation.
All-Purpose White Flour
I adore sourdough bread that bites me back when I eat it. In other words, extra sour with a tang. However, my husband HATES that kind of bread. That is why I use all-purpose white flour for my Starter.
This type of flour yields breads that are very much like a crusty Italian loaf that he and I both go crazy for. Additionally, I use the Starter from this type of flour for making baguettes that then make incredible Homemade Breadcrumbs and croutons. The final products are never overly sour.
Wheat or Rye Flour
Wheat and rye flour has more naturally occurring wild yeast. Because of this, the starter made from these types of flours will ferment faster and with more intensity. It is very important to keep a closer eye on Starters made from these flours and to use a glass jar that has a lid that is looser or can be left slightly open. The reason for this, a tight fitting lid could be a recipe for an exploding jar.
In conclusion, wheat and rye flours will make much stronger sourdough products and all-purpose white flours (unbleached) will yield more mild final products.
How To Make
To make Sourdough Starter that is ready to bake with will take approximately 7 days, give or take a day or two. Here are the instructions for each day.
Day 1
In a medium sized glass bowl mix together 50 grams of water and 50 grams of flour. Stir well and cover. Let sit at room temperature.
Pro Tip#1– To accurately weigh the flour and water start by making sure the scale is weighing in grams vs ounces. Place the bowl on the scale and turn on. The scale should read zero with the the bowl on top. Add enough flour to equal 50 grams. Calibrate the scale back to zero again and repeat with water.
Pro Tip#2– In the making and feeding of this starter there will always be equal parts of flour and water added to it.
Day 2
To yesterday’s mixture add 50 grams of flour and 50 grams of water. Stir well and cover. Let sit at room temperature.
Day 3
Throw away half of the Starter. To the remaining Starter add 100 grams of flour and 100 grams of water. Stir well and cover. Let sit at room temperature.
Pro Tip#3– The discarded Starter from day 3- day 6 is not fully developed enough to have any uses. Simply throw it away.
Day 4
Throw away half of the starter. Add 150 grams of flour and 150 grams of water to the bowl and stir well. Cover and let sit at room temperature.
Pro Tip#4– Day 4 is the day that you will notice the mixture starting to take on the personality of a Sourdough Starter. There should be small bubbles and a slight sour smell will start to take shape.
Day 5
Similar to the previous days, throw away half of the Starter and add 150 grams of flour and 150 grams of water. Stir well, cover and let sit at room temperature.
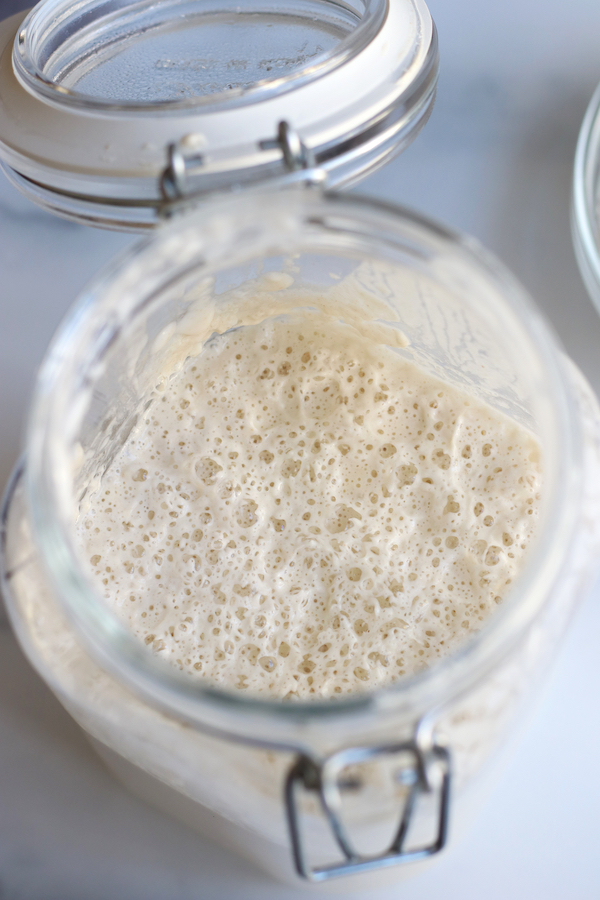
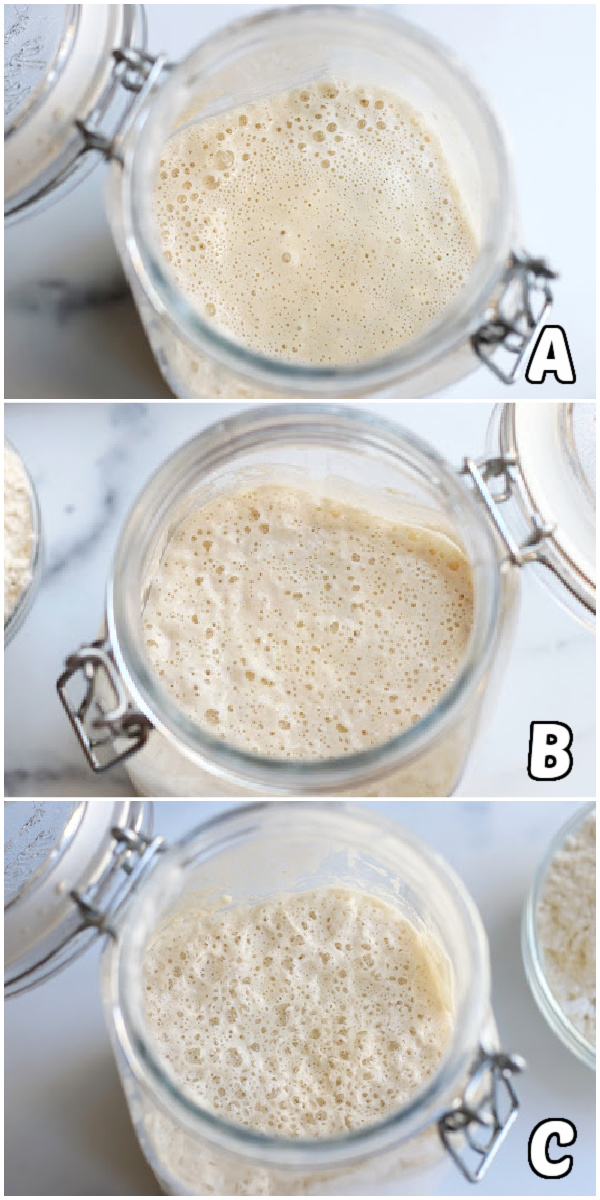
Pro Tip#5– The Starter should begin to look very similar to picture A below. If not do not worry, it will very soon. Also, feel free to transfer to the glass jar once the new flour and water its mixed in on day 5.
Day 6
Throw away half of the starter and add 200 grams of flour and 200 grams of water. Stir well, cover and let sit at room temperature.
Pro Tip#6– By day 6 the Starter should look similar to photo A below and very possibly look like photo B.
Day 7
On day 7 the Starter should at the least look like photo B if not like photo C. If it has a similar appearance to photo C, it is ready to use. If it looks like photo B, let it sit at room temperature for one additional day.
Feeding and Reviving Sourdough Starter
Above all, if your Starter looks like photo C it is ready to be used for making all kinds of sourdough products. If it looks like photo B, you can still use it for baking. However, it will slow down the rising of bread dough. When it looks like photo A, it is time to feed the Starter.
To feed the Sourdough Starter, discard half of it and add 150 grams of flour and 150 grams of water to the remaining Starter. Stir well and let sit at room temperature overnight. If on the second day the Starter has the appearance of photo B, let it sit at room temperature for one additional day before using it in recipes.
Pro Tip#7– If storing the Starter at room temperature it will need to be fed every 2-3 days. If storing in the refrigerator, it can be kept safely for up to 10 days before feeding. Please note that if storing in the refrigerator 2 feedings will most likely be needed before the Starter will look like photo C.
Starter Smell and How to Know if it has Gone Bad
A healthy Sourdough Starter is going to smell sour. Therefore, it is not the best way to judge whether it has gone bad. However, the best way to know is by its appearance. If there are any visible signs of mold or red/orange spots it is time to throw the Starter out and begin again. Take heart though, Sourdough Starters are full of good bacteria. Because of this, chances of it going bad are much lower.
Maintaining Sourdough Starter
For anyone new to sourdough baking, it is incredibly normal to have many questions and concerns about maintaining your sourdough starter. How To Maintain Sourdough Starter has a complete breakdown of the feeding schedule, common concerns and questions so that you can enjoy your sourdough starter for decades to come.
If you enjoyed this Sourdough Starter please let me know by leaving a comment and review below. Doing so helps to encourage others to make the recipe also. Thank you!
Easy Sourdough Starter
Ingredients
- 700 grams white all-purpose flour
- 700 grams filtered water
Instructions
Day 1
- In a medium sized glass bowl mix together 50 grams of water and 50 grams of flour. Stir well and cover. Let sit at room temperature.See Note #1 and Note #2 below.
Day 2
- To yesterday’s mixture add 50 grams of flour and 50 grams of water. Stir well and cover. Let sit at room temperature.
Day 3
- Throw away half of the Starter. To the remaining Starter add 100 grams of flour and 100 grams of water. Stir well and cover. Let sit at room temperature.See Note #3 below.
Day 4
- Throw away half of the starter. Add 150 grams of flour and 150 grams of water to the bowl and stir well. Cover and let sit at room temperature. See Note #4 below.
Day 5
- Similar to the previous days, throw away half of the Starter and add 150 grams of flour and 150 grams of water. Stir well, cover and let sit at room temperature. See Note #5 below.
Day 6
- Throw away half of the starter and add 200 grams of flour and 200 grams of water. Stir well, cover and let sit at room temperature. See Note #6 below.
Day 7
- On day 7 the Starter should at the least look like photo B above if not like photo C. If it has a similar appearance to photo C, it is ready to use. If it looks like photo B, let it sit at room temperature for one additional day.






Hey I’m Lisa and I’m on day 8. My starter is doubling and has bubbles on top but not throughout. This morning it’s very runny. I have also been doing the float test to see if it’s ready to use. Last night some of it floated so I was hoping it would be ready this morning but like I said it’s more thin and runny. I plan on discarding half and feeding with the 150 /150 ratio. Is that correct? Should I rely on the float test to know when it’s ready to attempt a loaf?
Hi Lisa. These are such good questions. From the sounds of it, you are very close to making bread. The hooch (liquid on top) you are seeing is normal and it just means that your starter needs to be fed. When you wake up in the morning and the starter is bubbly with no hooch, you will be ready to go with bread making. Basically, sourdough starters are like children. They all have commonalities (childlike behavior and such) but with different personalities. Some just take a few more days of feeding.
Doing the float test is not a bad idea at all. However, you will know based on how it looks the next morning. This post may also be helpful. https://www.thefedupfoodie.com/how-to-maintain-sourdough-starter/
I would love to know how everything turns out and happy sourdough baking!
Do we have to throw out the dough. I do not want to do that. I want to use it all 👍what and why must I do this. Thank you
Hi Teresa. It’s a common concern for many. In short, discarding half helps in control acidity and keeps your starter healthy. Also, if you never discarded, you have a ginormous amount of starter that would be unmanageable.
Here are a few suggestions that may help. Save the discard and create a sourdough starter for friends and family or use the discard within recipes that call for sourdough discard. This post may also be a helpful resource. https://www.thefedupfoodie.com/how-to-maintain-sourdough-starter/
On day 7 of making my starter, should it be double in size? Mine is bubbly on the top but it hasn’t expanded at all. I’ve left it sitting in the warmest room in my house and nothing is happening.
It sounds like you are very close to being able to make bread. I would feed it for another 1-2 days. A brand new starter may not completely double is size but will expand. A mature starter definitely doubles. I hope this helps and happy sourdough baking.
Good morning! Ok on day 10 now and my starter still doesn’t past the float test. I threw out half and cleaned my jar good. I plan on feeding it 100 grams of flour and 100 grams of water today. Also switching to bread flour to see if that helps. Am I still in the right track? Is the feeding ration right? Or should it be more? Thank you for all you advise.
Thank you for the step by step instructions. Loved the pro tips and pictures.
That makes me so happy to hear. I have all kinds of fun sourdough recipes planned for the year.
Hi I was wondering how to keep feeding your sourdough even after the seven days and how much should you feed the starter?
I’m technically on day 5 of my starter but got sidetracked on day 4 and forgot to feed. Day “5” had some hooch so I just stirred in back in then I discarded 1/2 and did 150g of flour and water. It has been 6hrs now since I fed it and it still a little runny and it does have some bubbles on it. Should I add more flour? Did I mess up by not feeding it on day 4?
Hi Kirsten. All is ok. I would just go ahead and do the normal routine tomorrow with discarding feeding. It may just add 1 or 2 more days of feeding before it is ready to make bread. Also, I recently published How to Maintain Sourdough Starter. You may find after reading it that you are right on track. https://www.thefedupfoodie.com/how-to-maintain-sourdough-starter/
When you say discard half, do you mean measure it out and discard exactly half, weigh it and discard half or just eyeball it?
Hi Jessica. It is really hard to be exact so I suggest to just eyeball it.
I am on day 7 and it smells like finger nail polish remover . I’m wondering if I need to do a little less water?
Hi Catina. I can understand the concern. Sourdough starter smelling like acetone is a normal part of the fermentation process. It is a sign that it needs to be fed. I would recommend sticking to the normal amounts of both water and flour.
Help ! I forgot to discard half before putting in 150 g of water and flour. Is my starter going to be okay?
Hi Kim. Yes, it will be ok. I am assuming your starter is still fairly young, so go ahead and discard a little over half tomorrow and continue with the normal feeding schedule. If your starter was mature and close to the bread making stage, it would be wise to divide it into two containers and share with a friend. This is because mature starters will overflow the jar if the discard doesn’t happen.
I hope this helps. Also, this recent post may be helpful. https://www.thefedupfoodie.com/how-to-maintain-sourdough-starter/
Hi everyone! I’m on day 7, but my starter still looks like picture A. I’m not sure if I should feed it or let it rest for another day and see if it looks more like picture B. Please help!
Hi Ashli. Yes, letting your starter rest a day in colder temperatures can be a big help. I would continue with the discard and feeding it 150 grams of both water and flour in addittion to letting it rest for about 36 hours or so in between feedings until it looks like picture C. Also, the recent post may be a support. https://www.thefedupfoodie.com/how-to-maintain-sourdough-starter/
Please keep me updated. I would love to hear how it goes.
I’m on day 4 of my starter, but the last 2 days I’ve gotten “hooch” at the top. Is this normal? It happens within 12 hours of feeding my starter.
Hi Taylor. No it’s not uncommon. Anytime you see hooch it is a sign that the starter is hungry. This post may help to ease your mind. https://www.thefedupfoodie.com/how-to-maintain-sourdough-starter/
So after I remove the amount needed for a recipe should I feed and then put back in the fridge? Not feed and refrigerate? Or feed and leave out a day or so? I may be overthinking lol
Hi Aimee. That all depends on what your plans are. Are you wanting to make bread right away? If so, you would feed after removing what you need. If you are not planning on making bread for awhile you can leave the starter sealed on the kitchen counter. You may find this post about maintaining the starter helpful. https://www.thefedupfoodie.com/how-to-maintain-sourdough-starter/
Good evening! I’m trying this for the first time. I am on day 3 and my starter has already doubled since this morning. Should I discard and feed again? It’s been 12 hours. Or just wait and do that in the morning?
Hi Valen. That is wonderful that you are seeing activity on day 3. Since the starter is young, I would go ahead a wait the full day to feed it again. Allowing the starter to ferment for a full day between feedings will help develop its flavor profile and strengthen its microbial community. If it has doubled in size already, it indicates that the yeast and bacteria are active and thriving. Waiting until tomorrow morning to discard and feed it again will give it ample time to continue developing complexity and strength. Keep an eye on its activity, and if it seems particularly vigorous or starts to overflow, you can consider transferring it to a larger container or discarding a portion to maintain its volume. Happy baking!
Hi, I’m on day 8 of my starter and it’s looked like photo A for the past four days or so. Should I let her rest today and skip discard and feeding? My kitchen temperature is a little cooler, around 66-68 degrees Fahrenheit, so I feel like that’s what’s stunting her.
Hi Katrina. Yes, cold temperatures can slow down the fermentation. The good news is that you are seeing bubbles. I would first recommend checking out this post that addresses common challenges to make sure that there is another factor slowing it down. https://www.thefedupfoodie.com/how-to-maintain-sourdough-starter/
Chances are though, your instincts are right on track. Please keep me updated. I would love to know how it goes.
I think I just got the hang of how to make the starter really good advise
Thank you
That makes me so happy to hear. Thank you so much Tammy!
I’m on day 3 but have yet to discard and add water and flour. This morning I saw no real changes but when I finally had time to actually work on it today, I’m noticing little greenish looking patches. Do I toss or continue to roll with it? Also, am I suppose to be keeping it covered?
Hey Alexis! Thanks for reaching out! 😊 It’s awesome that you’re diving into sourdough! Regarding those greenish patches, it does sound like there might be some unwanted guests in your starter. No worries, it happens to the best of us when we’re starting out! I’d recommend giving it another shot, and don’t forget to cover it up each time. If you have any questions along the way, feel free to ask! Happy baking!
Can I transfer my starter to a bowl or keep it in the jar ~ I’m on day 5
Hi Cindy. Day 5 is a good time to transfer the starter from the bowl to a jar. Since the starter is so small the first few days, the bowl is easiest to use. Once day 5 hits, the jar becomes the best storage option.
I would love to hear how your bread turns out. Happy Baking!
My starter on day 7 has bigger and less bubbles than the pictures. Any advice…?
Hey Jessie! Seeing differences in bubble size and activity is totally normal. To play it safe, continue feeding for another 1-2 days. Keep an eye on any changes in bubbles during this time. Each starter has its own unique personality, so this observation period will help you understand yours better!
Why would my starter have pink spots on it ! It was third day when it happened.
Hi June. It sounds like your starter might have encountered some unwanted bacteria or mold growth. Pink spots could indicate contamination, especially if it’s on the third day of the fermentation process. I would suggest starting a new batch. Also, this post may be helpful in troubleshooting what the culprit may be. https://www.thefedupfoodie.com/how-to-maintain-sourdough-starter/
I am on day 7 and I still do not have any bubbles. The top of my starter also seems dry? Am I doing something wrong? Should I try a different flour?
What is an ideal temperature – I have a proofer I can use since I am in a cooler climate. Doesn’t seem to be a smell either.
Thank you for the recipe and an advice.
Hi there! Don’t worry, it’s not uncommon for starters to take a bit longer to show activity, especially depending on factors like temperature and the type of flour you’re using. If you’re in a cooler climate, using a proofer could definitely help speed up the process. Aim for a temperatures in the 70’s℉, as that’s ideal for yeast activity.
As for the dryness on the top, it’s possible that your starter might need more frequent feedings or a slightly higher hydration level. You could try adjusting the flour-to-water ratio in your feedings or covering your starter with a damp cloth to help retain moisture.
If you’re not noticing any smell yet, that’s okay too. Sometimes it takes a bit longer for the characteristic sour smell to develop. Just keep up with your feedings and be patient.
Also, this post may be of help. Its addresses the common challenges that many face when maintaining a sourdough stater. https://www.thefedupfoodie.com/how-to-maintain-sourdough-starter/
Regarding switching flours, it’s worth experimenting if you’re not seeing progress with your current flour. Some people find success with different types of flour, so feel free to give it a try if you’re curious.
Hang in there! I think once you address the hydration and temperature your starter should start to flourish.
Hello, I recently started the process you have provided but I accidentally fed the starter 150g of water and flour on day 3 instead of the 100g of water and flour. Will this ruin my starter? What do you suggest doing for the remaining steps? Thank you!! 💗
Hi Rylie! No worries at all. Just keep going with the process as usual. Your starter just might take a bit longer to mature. If needed, extend the discard and feeding for an extra day or two. You’re on the right track though. Happy Baking!