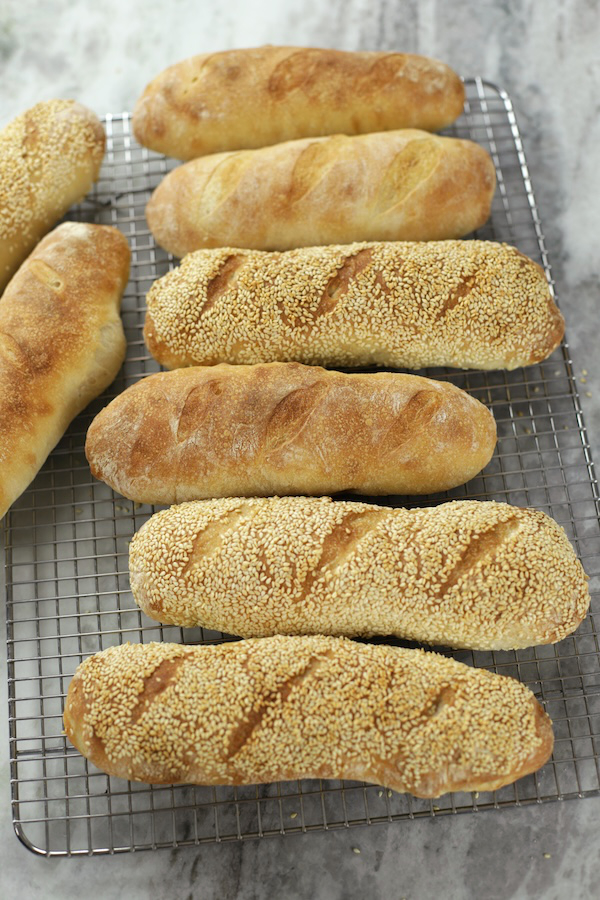
Sourdough Sub Rolls
These Sourdough Sub Rolls, also called hoagie rolls, sandwich rolls, or sandwich buns, are everything a great sandwich bread should be. They are flavorful and soft with a chewy interior that is strong enough to hold your favorite fillings without falling apart. Made using my Easy Sourdough Starter, they have a mild tang and delicious flavor. Rustic, satisfying, and the kind of bread that makes any sandwich feel a little more special.
This post may contain affiliate links, meaning I earn a small commission if you make a purchase—at no extra cost to you. Additionally, AI was used to assist with spelling, grammar, sentence clarity, and creative brainstorming.
The Secret to Soft and Fluffy Sourdough Sub Rolls
The magic behind these soft and fluffy Sourdough Sub Rolls comes down to two powerhouse ingredients, a well fed sourdough starter and just the right amount of oil.
My Easy Sourdough Starter, when active and bubbly, gives the dough a steady, natural rise and a beautiful, chewy structure without the need for commercial yeast. The oil, whether avocado or olive, is the secret weapon for softness. It keeps the crumb tender and moist, giving these rolls their signature pillowy texture.
Timeline for Making Sourdough Hoagie Rolls from Start to Finish
If you’re starting completely from scratch, give yourself about 7 days to grow a strong and active sourdough starter. Once your starter is bubbly and doubling reliably after feedings, you’re ready to make the rolls.
The actual roll-making process is a 2-day timeline:
- Day 1: Mix the dough and let it rise overnight.
- Day 2: Shape the rolls, proof and bake.
While these Sub Rolls take a bit of planning, most of the time is hands-off and the results are absolutely worth it.
Best Flour Options for Soft and Chewy Sourdough Rolls
Flour choice plays a huge role in the texture, structure, and flavor of your sourdough rolls. For rolls that are soft yet chewy, with enough strength to hold hearty fillings, you’ll want a flour that supports strong gluten development while balancing tenderness.
Here are the best options:
- Bread Flour– This is the go-to for many professional bakers. With a higher protein content (around 12-14%), it builds strong gluten for a chewy interior and rolls that hold their shape beautifully.
- All-Purpose Flour– Lower in protein than bread flour, it yields a softer crumb. Rolls made solely with all-purpose tend to be slightly more tender. This is by far my favorite flour to use for these rolls.
- Whole Wheat Flour– Adding 10–20% whole wheat to your dough can boost flavor and nutrition. Just keep in mind it absorbs more water and can tighten the crumb, so balance it with bread or all-purpose flour. A good rule of thumb is to increase the water by about 5–10 grams for every 100 grams of whole wheat flour added.
- Rye Flour– While rye has low gluten-forming potential, a small percentage (5–10%) adds depth of flavor. Use sparingly in your roll dough to avoid a dense texture.
Click here if you want to know the flour brands professional bakers swear by. I personally love King Arthur’s flours. Their Artisan Bread Flour and All-Purpose Flour are top-tier choices for sourdough baking. Buying directly from King Arthur means you’re getting flour that’s consistently fresh, handled with care, and trusted by professionals, something third-party sellers can’t always guarantee.
Ingredients Needed
- Active Sourdough Starter– This is the heart of the recipe. It should be bubbly and have doubled in size within 4 to 6 hours of feeding.
- Granulated Sugar– Just a small amount helps feed the natural yeast and contributes to a soft, tender crumb.
- Warm Water– A water temperature of 105℉-115℉ helps the wild yeast and bacteria in your starter become more active and multiply faster.
- All-Purpose Flour– While bread flour has more protein and creates a chewier texture, I prefer all-purpose flour for these rolls because it keeps them soft and tender.
- Salt– Essential for flavor and for balancing fermentation. I highly recommend not to skip it!
- Oil– Adds softness to the dough and keeps the rolls moist after baking. I love using either avocado or olive oil.
Most Helpful Tools
- Digital Kitchen Scale – A digital kitchen scale is a game-changer for sourdough. It gives you accurate measurements, so your dough stays perfectly balanced and predictable. No guessing, no surprises, just great bread every time.
- Dough Scraper – This is a must for easily removing sticky dough out of the bowl without a mess, saving you frustration and keeping your dough in one piece.
- Bench Scraper -Bench scrapers make sourdough easier by letting you cleanly divide, shape, and move sticky dough without the mess.
- Kitchen Thermometer – Mainly used to achieve a desirable warm water temperature that will aid in optimal fermentation of the dough.
- Bread Lame– Years ago, when I worked in a bakery, I used a tool that looked like a miniature saw, and it was incredible for scoring bread. This is the closest I’ve found to that original. I love how easy it is to use, and with the simple trick of oiling the blade, it creates beautifully scored bread without tearing the dough.
How to Make Sourdough Hoagie Rolls Step-by-Step
How to Mix the Dough
In a large bowl, weigh the sourdough starter, sugar and warm water, making sure to tare the scale before each ingredient. Stir until mostly dissolved. Add flour and salt and mix until combined. Pour in oil and mix until a rough shaggy dough forms. Cover with lightly greased plastic wrap and let rest at room temperature for 45 minutes.
Building Dough Strength with Stretch and Folds
After resting, gently stretch one side of the dough upward and fold it over the center. Rotate the bowl and repeat until you’ve worked all the way around. Cover and rest for 30 minutes, then repeat this stretch and fold process three more times. This will build strength and improves the final texture of the rolls without having to knead the dough.
Fermentation
After the final stretch and fold, let the dough ferment until it has noticeably risen, ideally by half or nearly double. At room temperature, this typically takes 6 to 8 hours depending on the starters strength and how warm your kitchen is. For deeper flavor, refrigerate the dough for up to 12 hours. After cold fermentation allow about 4 hours at room temperature for the dough to warm up and finish proofing if it hasn’t fully risen in the fridge.
Step-by-Step Guide to Shaping Sourdough Hoagie Rolls
Turn the proofed dough onto a lightly floured surface and gently pull the edges toward the center a few times to firm it up. Divide into 8 equal portions, about 170 grams each and roll each into a rough cylinder. Cover lightly and let rest for 30 minutes. To shape, flatten one piece into a rectangle, then roll the long edge away from you. Continue rolling and tucking to form a tight log, pinch the seam closed and gently roll to about 7-8 inches long. Place seam-side down on parchment-lined or lightly greased baking sheet. Repeat with remaining dough, then cover and rest for another 30 minutes.
Scoring and Baking
Preheat your oven for at least 30-45 minutes. After the final 30-minute proof, the rolls should look puffy but still hold their shape when gently touched. Just before baking, use a sharp blade or lame to score each roll. Bake on the center rack for 14-16 minutes or until golden brown. Let cool completely before slicing. ProTip: For the best golden-brown crust, bake one cookie sheet at a time, leaving a few minutes between batches to help the oven recover heat and maximize oven spring. If baking two sheets at once, be sure to rotate them halfway through for even baking.
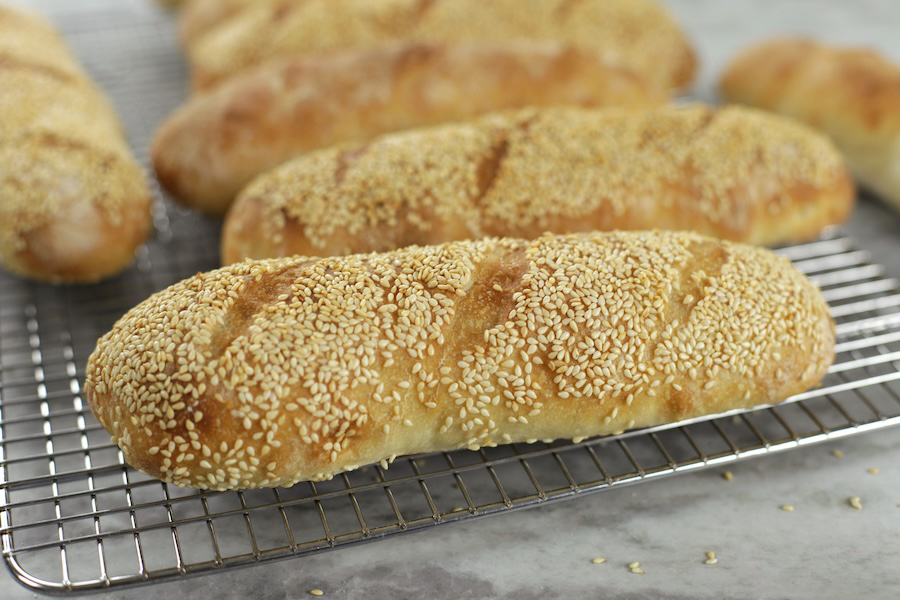
Topping Variations
Topping your sourdough sub rolls adds flavor, texture, and eye-catching appeal. Below are some delicious variations to try. Just be sure to lightly spray the rolls with water before adding toppings, then score as usual.
- Sesame Seeds– Adds a toasty, nutty flavor and classic deli-style look.
- Poppy Seeds– Mildly crunchy and subtly earthy.
- Everything Bagel Seasoning– Bold, garlicky, and savory with lots of texture.
- Caraway Seeds– Great with pastrami or rye-inspired sandwiches.
- Coarse Sea Salt (like Maldon’s)– Brings out flavor and adds a delicate crunch.
- Shredded Parmesan and Oregano– Salty and crisp when baked with a delicious Italian flavor.
- Crushed Red Pepper Flakes– Adds a little heat.
- Minced Rosemary or Thyme– Fresh and fragrant.
- Sunflower or Pumpkin Seeds– Adds crunch and visual appeal.
- Flax and Chia Seeds– Nutty and nutritious.
- Oats– Rustic and hearty, especially with whole wheat dough.
- Dried Onion Flakes– Sweet and savory.
- Jalapeño Slices & Cheddar– For a spicy twist.
- Cornmeal Dusting– For a subtle crunch and golden finish.
Top Tips to keep in mind
- Starting with an active and bubbly starter is key to achieving a good rise. You will know your starter is ready when it is bubbly and has doubled in size within 4-6 hours of feeding it.
- Don’t be afraid of sticky dough. It’s normal with sourdough and is key to that soft and chewy crumb. To keep it from sticking to your hands during stretch and folds, dip your fingers in water first.
- Gently pre-shaping into loose logs helps to build surface tension, helping to make the final rolls uniform and easier to shape.
- Make sure your oven is thoroughly preheated for at least 35-45 minutes before the rolls go in. This helps the dough spring up before the crust sets, giving you lighter rolls with great structure.
- Oil your sharp knife or lame before scoring. This will help to prevent the the dough from sticking, giving you a cleaner score.
- The easiest way to score the rolls is to hold the blade at a slight angle and make three quick, shallow slashes across the top, perpendicular to the length of the roll. Each cut should be one smooth motion that is firm, swift, and confident. Avoid dragging or sawing.
Storing and Freezing Homemade Sourdough Hoagie Rolls
Once your rolls are fully cooled, store them in an airtight container or ziplock bag at room temperature for up to 2 to 3 days. To keep the crust from getting too soft, avoid storing them while still warm or in a humid spot.
For longer storage, these rolls freeze beautifully:
- To freeze: Cool completely at room temperature then place in a freezer-safe bag or container. Freeze for up to 3 months.
- To thaw: Let them sit at room temperature for a few hours or warm in a 300°F oven for 10 to 15 minutes until soft and heated through.
Perfect Rolls for Philly Cheesesteaks, Meatball Subs, and More
These sourdough hoagie rolls are soft yet sturdy, making them ideal for sandwiches that need structure without sacrificing tenderness. Whether you’re piling on something hot and melty or keeping it light and crisp, these rolls hold up beautifully.
Here are just a few delicious ways to use them:
- Philly Cheesesteaks– Fill with thinly sliced sautéed beef (like skirt steak), sautéed peppers, caramelized onions and melty provolone.
- Meatball Subs– Spoon in tender meatballs with marinara and top with plenty of melted mozzarella or provolone.
- BBQ Chicken Sandwiches– Skip the hamburger buns and use these sourdough sub rolls for a heartier, more flavorful sandwich. Pile on the BBQ chicken and top with crunchy slaw or pickled onions for the perfect balance of smoky, tangy, and crisp.
- Grilled Veggie Sandwiches– Stack roasted squash, mushrooms, bell peppers, hummus, goat cheese, and avocado for a satisfying meatless option.
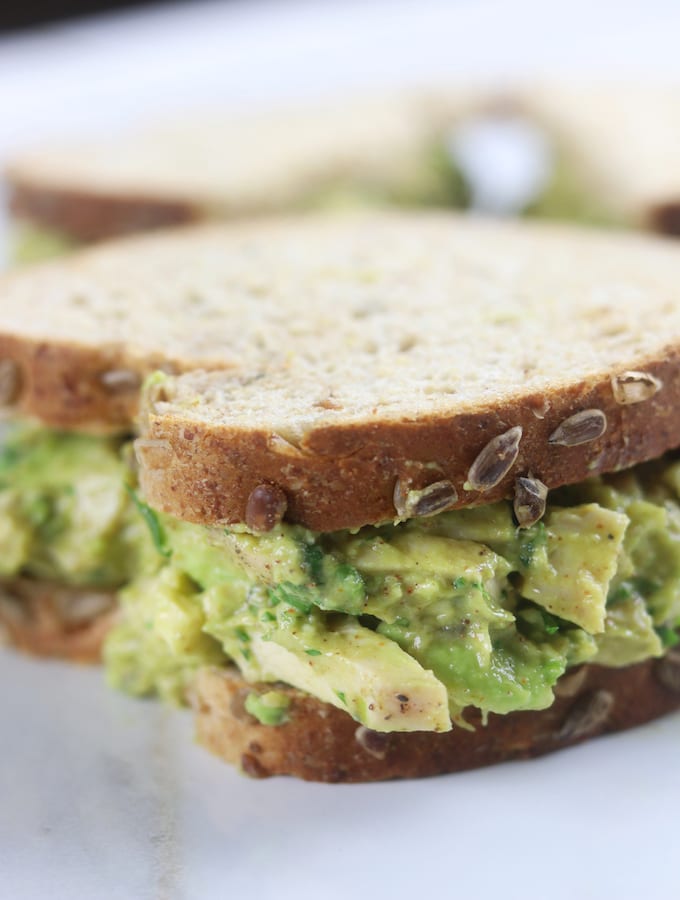
- Mediterranean Chicken Salad Sandwiches– A cool and refreshing option loaded with flavor, perfect for warm days.
- Chicken Breast Sandwich– Thinly slice Air Fryer Boneless Chicken Breasts and layer with lettuce, tomato, bacon and your favorite spread for an easy go-to sandwich.
- Meatloaf Sandwiches– Use leftover meatloaf and serve warm or cold with cheese and sauce on a toasted roll. This is comfort food in sandwich form.
- Deli-Style Tri Tip Sandwich– Use thinly sliced cold Oven Roasted Tri-Tip as you would roast beef, layered with your favorite sandwich toppings.
Troubleshooting Tips for Flat or Dense Sourdough Rolls
If your rolls turned out flat or dense, you’re not alone. It’s a common challenge for new sourdough bakers. The good news is, there are a few key areas to check so your next batch turns out soft and beautifully risen:
- Starter Wasn’t Quite Ready– If your starter isn’t doubling reliably or lacks bubbles, it may not have enough strength to raise the dough. Keep feeding it for a few more days until it’s consistently active.
- Underproofed Dough– Rolls need enough time to rise after shaping. If they go into the oven before they’re fully proofed, they can turn out dense. The dough should look puffy and spring back slowly when gently pressed.
- Too Much Flour– Adding extra flour to sticky dough can make the rolls heavy. Instead, use wet or lightly floured hands and give the dough time to strengthen through stretch and folds.
- Overproofed Dough– If the rolls rise too long, they can collapse in the oven. Watch for signs of overproofing, like dough that feels fragile, overly airy, or deflates when touched.
- Cool Oven– Be sure to preheat your oven for at least 30 minutes before baking. A fully heated oven helps the rolls rise quickly during the first few minutes of baking, which creates a lighter texture and better shape. This quick rise is called “oven spring,” and it makes a big difference in the final result.
Frequently Asked Questions
How do I know if my sourdough starter is strong enough to bake with?
Your starter is ready to bake with when it consistently doubles in size within 4 to 6 hours of feeding, has plenty of bubbles, feels puffy when stirred and smells pleasantly tangy. These signs show that your natural yeast is active and strong enough to raise dough.
Can I use all-purpose flour instead of bread flour?
Yes, you can use all-purpose flour instead of bread flour. All-purpose has slightly less protein, which means your rolls will turn out softer and less chewy, which is actually perfect for hoagie rolls. Just make sure it’s unbleached for the best texture and flavor.
What’s the stretch and fold technique, and why is it important?
The stretch and fold technique is a gentle way to build strength in your dough without kneading. You simply stretch one side of the dough upward and fold it over onto itself, then repeat on all sides. It helps develop gluten, improves structure, and creates a better rise all while keeping the dough soft and manageable.
My dough is sticky when I do the stretch and folds. Should I add more flour?
Sticky dough is completely normal with sourdough. Instead of adding more flour (which can make the rolls dense), try dipping your hands in water before handling the dough. This will help prevent sticking without causing a dense roll. As you continue stretching and folding, the dough will become easier to work with.
How do I know when the rolls are fully baked?
The rolls are done when they’re golden brown on top and feel light for their size. If you gently tap the bottom, they should sound slightly hollow.

Sourdough Sub Rolls
Ingredients
- 200 grams Easy Sourdough Starter
- 25 grams granulated sugar
- 435 grams warm water (105-115℉)
- 670 grams all purpose Flour
- 20 grams salt
- 35 grams oil *avocado or olive oil
Instructions
Mixing the Dough
- In a large bowl, weigh and combine the sourdough starter, sugar, and warm water. Stir until the starter is mostly dissolved.Note: Remember to tare the scale before weighing your ingredients.
- Add the flour and salt, then mix until most of the flour is incorporated.
- Add the oil and continue mixing until a rough, shaggy dough forms. Cover the bowl with lightly greased plastic wrap and let it rest at room temperature for 45 minutes.
Stretch and Fold
- Tip: Dip your fingers in water first to prevent sticking during stretch and folds.After the dough has rested, take one side and gently stretch it upward, then fold it over the center. Turn the bowl slightly and repeat, working your way around the dough for about one minute.
- Cover the bowl again and let the dough rest for 30 minutes. Repeat this stretch, fold, and rest process a total of four times. This helps build strength in the dough and improves the texture of the rolls.
Fermentation
- After the final stretch and fold, let the dough rest and ferment until it has noticeably risen, ideally by about half or nearly double in size. At room temperature, this typically takes between six and eight hours, depending on the ambient room temperature. For a slower fermentation and deeper flavor, you can refrigerate the dough and let it proof for about twelve hours. See Note #1 below.
Preshaping of the Rolls
- Tip: If you refrigerate the dough during fermentation, let it warm up to room temperature before shaping. This makes the dough easier to work with and helps create better texture in the finished rolls.
- Turn the proofed dough onto a lightly floured flat surface.
- Gently pinch the edge of the dough, then pull and fold it into the center a few times to firm up the dough before dividing.
- Divide the dough into 8 equal portions that weigh approximately 170 grams each.
- Working with one dough ball at a time, roll into a rough cylinder.
- Repeat with the remaining pieces, then cover lightly and let rest for 30 minutes. See Note #2 below
Final Shaping and Rise of the Rolls
- Preheat oven to 425℉.
- Place one dough piece on a lightly floured surface and using your fingertips, gently flatten into a rough rectangle.
- Starting with the long end, roll the bottom edge (closest to you) up toward the center.
- Roll the dough away from you, tucking as you go to build tension and form a tight log.
- Once fully rolled, gently pinch the seam closed along the bottom.
- Roll it back and forth to even out the shape, aiming for about 7–8 inches long.
- Place seam-side down on a parchment-lined baking sheet (or lightly greased enameled cookie sheet).
- Repeat with remaining dough. Cover and let rest for an additional 30 minutes.
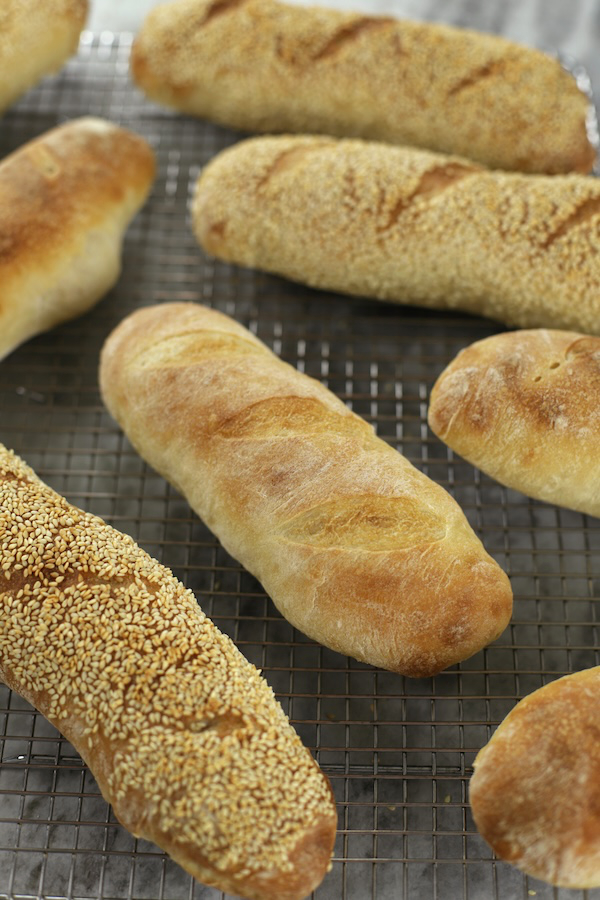
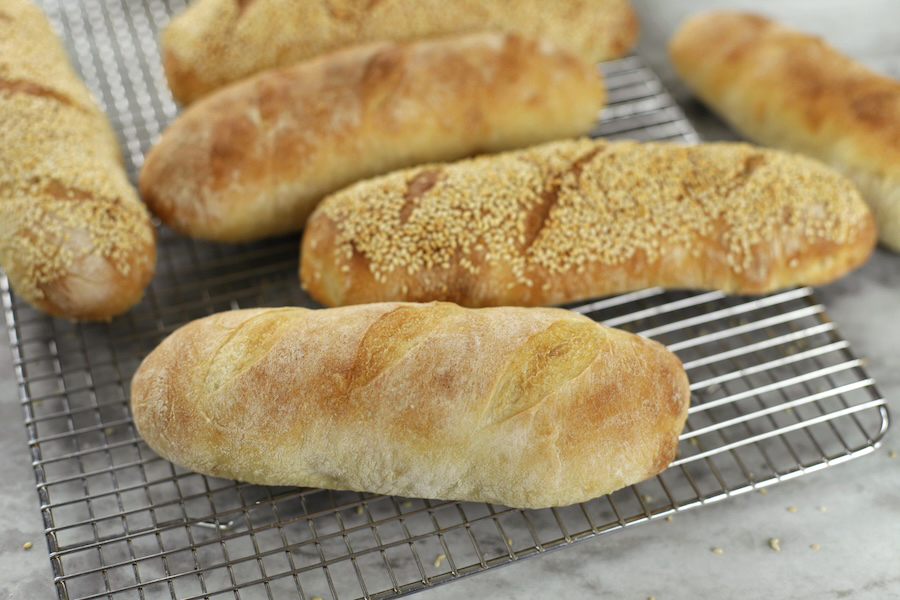
Scoring and Baking
- After the final 30-minute proof, the rolls should look puffy but still hold their shape when gently touched.
- Use a sharp blade or lame to score by either 1) making one lengthwise slash down the center of each roll, about ¼ inch deep, holding the blade at a slight angle or 2) Make 3–4 shallow diagonal cuts across the top of each roll, spaced evenly. Tip: Lightly oiling your blade helps to prevent the dough from sticking while scoring.
- Bake in a preheated 425 on the center rack for 14-16 minutes or until golden brown. Cool completely before cutting. See Note #3 below.


These turned out really great! Perfect flavor and texture. I just put half of them in the freezer to take camping next week and the other half I’m going to enjoy making sub sandwiches on. Thanks for a great recipe!
This makes me so happy! Thank yo so much Kathy for taking the time to make the sub rolls. I have run out of them in my freezer and reading this makes me want them again. An Italian sub on a Friday night is so fun. Love the idea of taking them camping!